Thursday, June 12, 2014

Lemon Curd, Blueberry, Cheesecake Layer Cake


Inspired by this beautiful cake (left) I saw a long time ago on Pinterest, I finally had the opportunity to make a Lemon Curd, Blueberry, Cheesecake Layer Cake. A bit of a title, I know. But delicious. Here are the recipes I used.


Blueberry and lemon cake adapted from Sweetapolita:
Ingredients
  • 1 1/2 cups  (200 g) all-purpose flour, sifted
  • 1.5 teaspoons (6 g) baking powder
  • 1 teaspoon (7g) salt
  • 2 cups blueberries
  • 1/3 cup (80 ml) sour cream
  • 1/3 cup (80 ml) whole milk
  • 2 teaspoons (10 ml) pure vanilla extract
  • 1 teaspoon (5 ml) lemon zest
  • 2/3 cup 160g unsalted butter, softened
  • 1 cup (200 g) white sugar
  • 3 eggs, at room temperature 
    For the Cake:
  1. Preheat oven to 180°F. Prepare two 20cm round cake pans with baking paper. Sift dry ingredients into medium bowl. Transfer 1 tablespoon flour mixture to larger bowl. Add blueberries and toss to coat them with flour. Set remaining flour mixture and blueberries aside.
  2. Combine sour cream, milk, vanilla extract and lemon zest in small bowl.
  3. In the bowl of a stand mixer, cream butter and sugar, until pale yellow and very fluffy, about 5 minutes. Beat in eggs one at a time, until well combined.
  4. Mix in flour mixture alternately with milk mixture, starting and ending with flour mixture. Stir until just combined. Gently fold in blueberries.
  5. Divide batter equally among prepared pans. Bake cakes until toothpick inserted into center comes out clean, about 25 minutes. Cool cakes in pans on racks for about 10 minutes, then invert onto racks until completely cool. 
Lemon Curd, also from Sweetapolita:
Ingredients
2/3 cup lemon juice (about four lemons)

zest of one lemon
2 whole eggs plus 4 egg yolks
1 cup sugar (200 grams) (7 ounces)
4 tablespoons (60 grams) (2 ounces) unsalted butter, at room temperature and cut into small even cubes

Method
1. Fill a saucepan with 1″ of water, then place a metal bowl on top of the saucepan. You will need to ensure the bowl fits snugly into the top of the saucepan and that the bottom of the bowl doesn’t touch the water (important, or your eggs will cook!). You can now remove the bowl and continue with making the curd.
2. Whisk the juice, zest, whole eggs, egg yolks and sugar in the bowl until smooth. Add the butter cubes to the bowl, but don’t stir.
3. Heat the water in the saucepan over low heat until it simmers (not boils) and place the bowl atop the rim. Stirring gently, but constantly, using heatproof spatula or wooden spoon, cook until the curd has thickened and all of the butter has melted and is incorporated, about 10 minutes (this can vary). To test if the curd is thick enough, remove the spatula or spoon from the curd and check that it’s coated.
4. Strain the curd over a bowl using a fine-mesh sieve. Cover with plastic wrap pressed directly against the curd (to prevent a skin from forming) and chill for at least 3 hours.

The Cheesecake layer came from Donna Hay as featured on Masterchef
(NOTE: I only used 2/3 of this mixture for this layer, I used the rest of the mixture to make two mini passionfruit cheesecakes)


  1. To make the filling, place the cream cheese, ricotta, eggs, sugar, lemon rind, juice and vanilla in a food processor. Combine the cornflour and water until smooth and add to the cheese mixture. Process the mixture until smooth.
  2. Grease the sides of a 20cm cake tin with a little butter and then pour in the filling. Tap lightly to remove any air bubbles. Bake for 1 hour. Turn the oven off and stand the cake in the oven for 1 hour, leaving the door closed. Refrigerate until cold and serve with fresh berries.  

Cream Cheese Frosting
  • 2 x 250g pkts cream cheese, at room temperature
  • 300g (2 cups) pure icing sugar
  • 120g butter, at room temperature
  • 1 teaspoon lemon juice 
Use an electric beater to beat the cream cheese, icing sugar, butter and lemon juice until smooth. 

To assemble, place a layer of blueberry cake on a cakeboard. Pipe frosting around the edge and spread 1/2-1 cup lemon curd over the cake. Place cheesecake layer on top. Again, pipe frosting around the edge and spread 1/2-1 cup lemon curd over the top. Place blueberry cake on top. Apply a crumb coat of frosting to the entire cake. Place in refrigerator for an hour. Apply a smooth coat of frosting to the sides and top. Spread lemon cord over the top, leaving 1cm around the edge. Pipe a border to complete the cake.

My inspiration for the top came from this picture:
 

Sunday, February 16, 2014

fructose free (except in fruit)

The time came for me to give up sugar. It had been delayed by a pregnancy and then adjusting to life with a baby and then holiday season, but after a week long camp where sugary food was on offer five times a day, it was time to cut down. Then the headaches started and I realised it really was a problem for me.

My goal in quitting sugar was really to break the addiction. I didn't like the lack of self control I exhibited when chocolate was nearby and wanted to beat the desire within me. I haven't been hugely strict. At parties or at someone's house I'll have a taste of whatever they've made. Giving up baking made leaving sugar behind hard, but I have (only a month or so into my journey) begun experimenting with stevia, dextrose and rice malt syrup. So far nothing I have produced has been as alluring as Martha Stewart's Ultimate Brownies, but that's the point, right? (my one attempt at fructose free brownies is in the cupboard, about to find its way to the bin...)

I'm having a Tupperware Party on Thursday and I'm planning the dessert menu. As well as fruit and cheese, I'm going to try Banoffee Pie using the caramel sauce recipe from David Gillespie's Sweet Poison Cookbook, whipped cream, bananas and a fructose-free version of Momofuku Milk Bar's crack pie base.

First, make the oat cookie:

oat cookie recipe

makes 1 tray-sized cookie
115g butter, melted
1/3 cup rice malt syrup
3 tbs dextrose powder
1 egg
8g (1/2 cup) flour
120g (1 1/2 cups) rolled oats
0.5g (1/8 tsp) baking powder
0.25g (pinch) baking soda
2g (1/2 tsp) salt

1. heat the oven to 170°C.
2. combine the butter, syrup and dextrose in a bowl. Add the egg and stir well (this can be done with an electric mixer if that is easier for you!)
3. add the flour, oats, baking powder, baking soda, and salt. Stir until all remnants of dry ingredients have been incorporated. the dough will be a slightly fluffy, fatty mixture in comparison to your average cookie dough. scrape down the sides of the bowl.
4. spray a quarter sheet pan and line with parchment, or just line the pan with a silpat. plop the cookie dough in the center of the pan and, with a spatula, spread it out until it is 1/4 inch thick. the dough won’t end up covering the entire pan; this is ok.
5. bake for 15 minutes, or until it resembles an oatmeal cookie-caramelized on top and puffed slightly but set firmly. cool completely before using. wrapped well in plastic, the oat cookie will keep fresh in the fridge for up to 1 week.

And to make the base using the cookie:

15 g (1 tbs) rice malt syrup
1 g (1/4 tsp) salt
55 g (4 tbs) butter, melted, or as needed


1. heat the oven to 170°C.
2. put the oat cookie, syrup, and salt in a food processor and pulse it on and off until the cookie is broken down into a wet sand. (if you don’t have a food processor, you can fake it till you make it and crumble the oat cookie diligently with your hands.)
3. Add the butter, and knead the butter and ground cookie mixture until moist enough to form into a ball. if it is not moist enough to do so, melt an additional 14 to 25 g (1 to 1½ tablespoons) butter and knead it in.
4. divide the oat crust evenly between 2 (10-inch) pie tins. using your fingers and the palms of your hands, press the oat cookie crust firmly into each pie tin, making sure the bottom and sides of the tin are evenly covered. bake for 10-15 minutes, until shells begin to brown.

then make it into banoffee:
Cover cooled base with a thin layer of caramel sauce. Whip cream and fold 2 sliced bananas through it. Dollop on top of pie. Top with remainder of sliced banana. Drizzle liberally with caramel sauce.

Friday, December 27, 2013

Dolls house

I've been working on this dolls house for a long time and it's nice to finally see it being played with!


I bought the house renovated and furnished for $59 from eBay. The woman I bought it from had done a great job painting the outside and collecting furniture for each room, but I had plans to renovate further, and some of the furniture was in quite a different scale to everything else. 
I painted the inside white and wallpapered each room. I also made some pieces of furniture, and painted a lot of what came with the house. 

Here's a quick walkthrough, starting from the top:


The kids bedroom. The baby furniture came with the house and was pretty new so I didn't do anything with it. The beds I made from balsa wood (painted with leftover house paint), with cardboard and batting mattresses. I made little patchwork quilts and pillows for the beds. The rug is a coaster I crocheted but never got around to crocheting more...


A pretty basic kitchen and dining table. I added the felt rug as the room was looking a little too white. 


Probably my favourite room. I made the lounges using cardboard, quilt batting and fabric, using dimensions from a lounge at home (I went with 1:15 scale so it wouldn't look out of place with 1:12 furniture/people or 1:18 - like Lundby and Sylvanian Families). 

I made the coffee table from balsa wood and the lamp using the bottle Hoyts brand if Saffron comes in. I also crocheted the cushion to match one in our living room, and painted the bookshelf. 


Parents' bedroom, featuring another balsa bed and a double sided quilt. 


And finally the bathroom, with freshly painted furniture that came with the house. 

I'd love to add more miniatures, but with a two year old I know that whatever is not broken or lost I will constantly have to put back in place, so I'll save it for another time!

Sunday, October 27, 2013

Caramel Apple Cheesecake Slab Cake


I made a cake for church morning tea and before I forget the recipes I used I thought I'd collect them all here so I can make it again!

I did the cheesecake layer first, from the taste website:
  • 2 x 250g packets cream cheese, softened
  • 3/4 cup caster sugar
  • 3/4 cup sour cream
  • 1 teaspoon vanilla extract
  • 1 teaspoon finely grated lemon rind
  • 3 eggs
  • Preheat oven to 160°C/140°C fan-forced. Line a baking dish, approx 18x28cm, with baking paper.
  • Process cream cheese, sugar, sour cream and vanilla until smooth. Add eggs, 1 at a time, processing until just combined. Pour into prepared pan. Bake for 50 minutes to 1 hour or until just set and centre wobbles slightly. Allow to cool in oven for 2 hours, with door ajar. Refrigerate.


And then the apple cake, recipe from pies and plots (Australianised)
  • 2 cups plain flour
  • 1 teaspoon baking powder
  • ½ teaspoon bicarb soda
  • 2 teaspoons ground cinnamon
  • ½ teaspoon ground cloves
  • ½ teaspoon ground nutmeg
  • 250g butter, room temperature
  • 2 cups sugar
  • 4 large eggs
  • 2 teaspoons vanilla extract
  • ⅓ cup milk
  • 2 ½ - 3 cups apples peeled, cored, and chopped finely (any variety)
  1. Preheat oven to 180 degrees C. Line the same dish you used for the cheesecake with baking paper.
  2. In a medium bowl, stir together flour, baking powder, bicarb soda, salt, cinnamon, cloves, and nutmeg.
  3. Cream butter and sugar until light and fluffy. Add the eggs one at a time, mixing after each addition. Add vanilla and milk and beat until fully combined and light and fluffy. Stir in apples and flour mixture. Mix until just combined.
  4. Pour batter into prepared pan and bake for 35-45 minutes, rotating halfway through, until a toothpick inserted in the center comes out with only a few moist crumbs. Cool cake completely in pan. Cake may be made one day ahead of time.

And cream cheese frosting:
  • 2 x 250g pkts cream cheese, at room temperature
  • 300g (2 cups) icing sugar mixture
  • 120g butter, at room temperature
  • 1 tsp vanilla essence
  1. Use an electric beater to beat the cream cheese, icing sugar, extra butter and extra vanilla until smooth.
  2. Smooth a thin amount over the apple cake and carefully place cheesecake on top. Cover the sides and top edges with frosting.


And finally, the caramel, from Mum what's for dinner? (I love this recipe because it isn't too runny or too chewy, but has a ganache-like consistency)
  • 1/2 cup sugar
  • 2 tablespoons water
  • 1 tablespoon butter
  • 1/2 cup cream
    1.  Combine sugar and 2 tablespoons water in a medium, heavy saucepan over medium-high heat; cook until sugar dissolves, stirring gently for 3 minutes. 
    2. Stop stirring and continue cooking 10 minutes or until the color of light brown sugar. Remove from heat; carefully stir in butter and cream. Place pan over medium-high heat until caramelized sugar melts. Bring to boil; cook 1 minute. 
    3. Remove pan from heat; cool caramel in fridge for 10 minutes before spreading over chilled cake (any longer and it will set too quickly on the cake).
    4. Pipe cream cheese frosting around the edge of the cake (I used Wilton tip 1M for the top and #12 for the base).

Wednesday, March 6, 2013

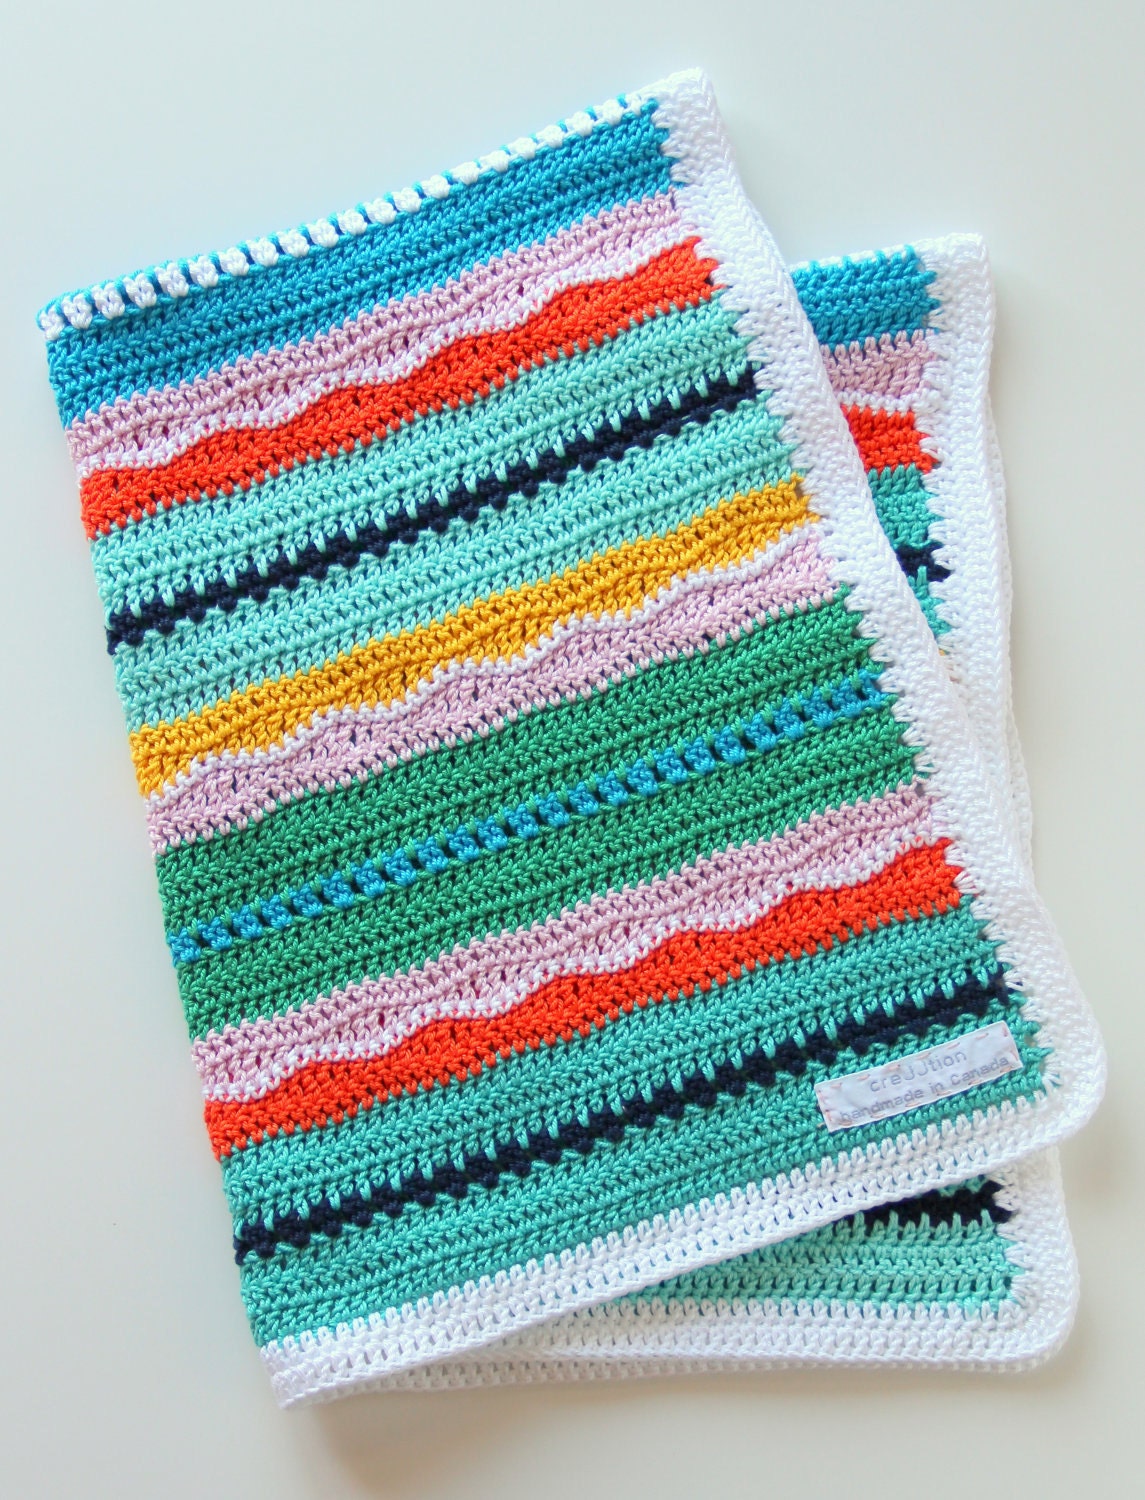
Mixed Stripe Blanket

My first two children missed out on having nice things made for them as I didn't know the sex until they were born and time for such things was gone. I'm confident enough that Baby #3 is a girl that I've started a blanket for her. A ripple blanket had been on my mind for awhile, but I don't cope well with doing the same thing over and over again. I had remembered seeing a mixed stripe blanket on Pinterest. I didn't repin it at the time, but it obviously stuck with me. Eventually I found it, and some others, for inspiration and have begun.
This is the other one I found, by Little Woolie

Mine is different to these two. I'm going for more textures and less pattern, so trying to have more open bits, but sticking to straight lines...
I will post soon with some pictures of how it is going!

Wednesday, October 3, 2012

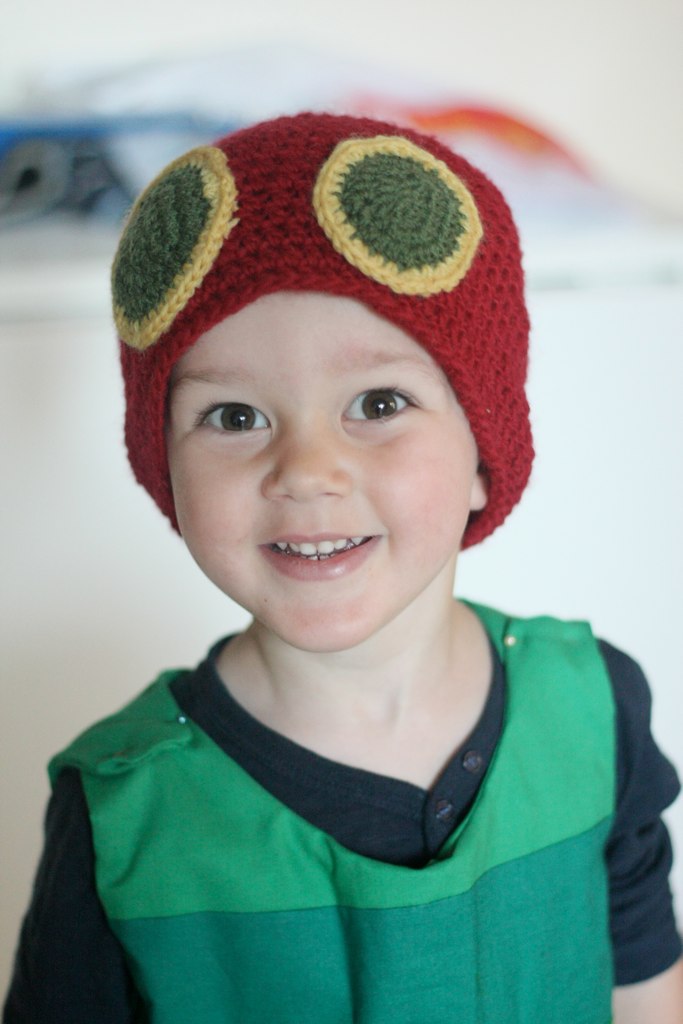
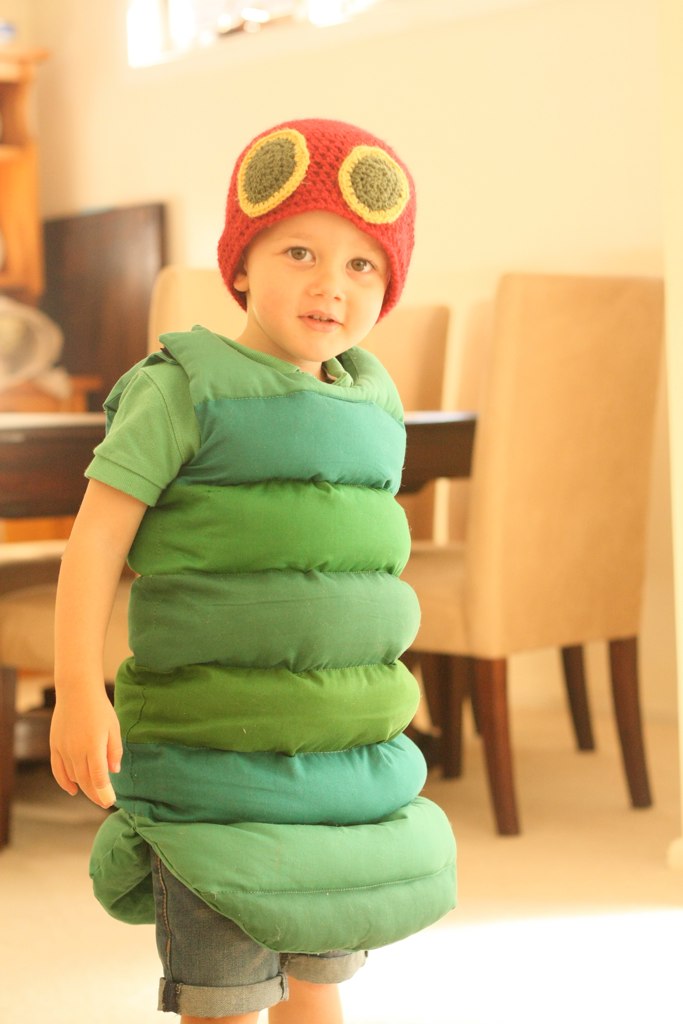
The Caterpillar Suit

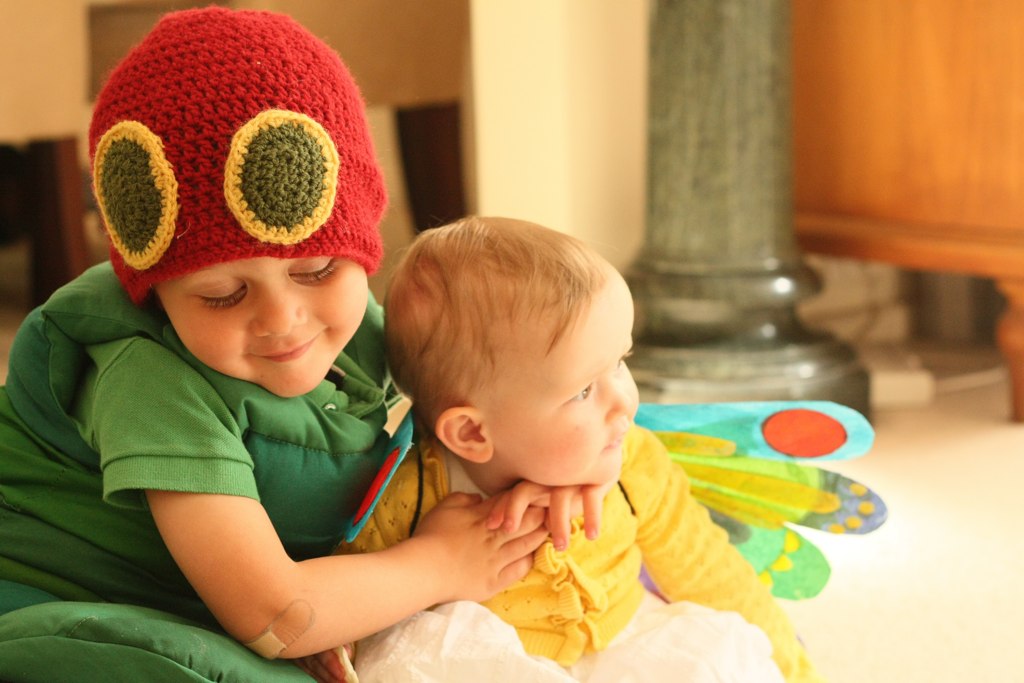
I thought it would be cute to crochet a very hungry caterpillar suit for Lenny for the party. I did a google images search and fatefully showed him the results. He saw a caterpillar suit and that was it. He had to have a caterpillar suit.

I was inspired by this tutorial, and this forum post but ended up doing my own thing.

First I made a pattern based on one of Lenny's tshirts. I made it longer and with tabs at the top. I cut a front and a back in plain green cotton for the lining and a second front and back from 10cm (4inch) strips of fabric in similar shades of green sewn together. I sewed the side seams of each, and then placed them right sides together and sewed the neck and arms.

I stuffed the top section with poly fill and stitched (in the ditch or as close to it as I could get) to enclose. I did the same with the second section. With the following sections, I sewed the stitch in the ditch first, and then unpicked the side seam of the lining to stuff. Hemming the bottom was a challenge. In the end I sewed an extra piece of green lining to the bottom two sections (right sides together) and did a second row of stitch in the ditch to keep it in place.
To hold the top tabs together I used sticky velcro (but it came off quite quickly, I need to use sew on!)


As you can see from the pictures, he was very pleased with his suit. He has worn it a number of times since (including riding to the Chemist on his scooter yesterday) and everyone loves it.

Oh and the beanie was crocheted using this pattern. I just made up the eyes (and they're different cos I did them too far apart to remember what I did!)

Sunday, September 9, 2012

A Very Hungry Caterpillar Party

Yesterday I put on a Very Hungry Caterpillar party for my kids. Their birthdays are close together and it seemed sensible to put all my energy into one party rather than try to do two. I needed a gender neutral theme and Pinterest had given me plenty of Very Hungry Caterpillar ideas...

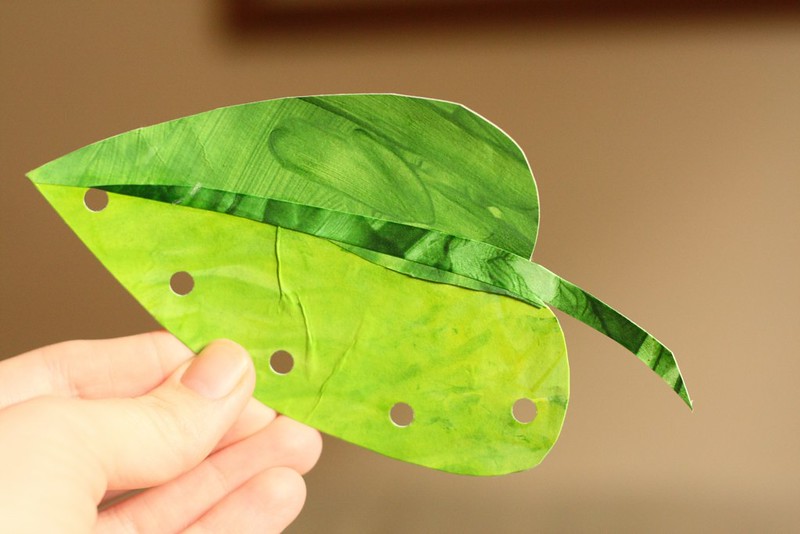
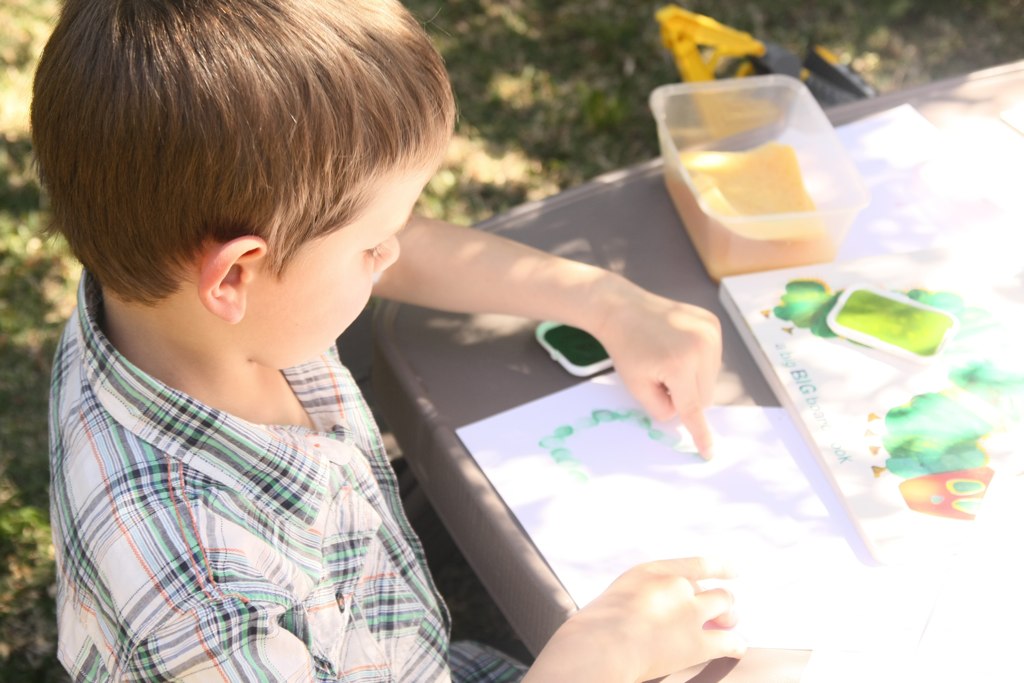
For the invitations I wanted something with a handmade element. I had seen a few leaf invitations online and so got my son to do some fingerpainting.

There was lots I could do in advance. I got to crocheting a beanie for my caterpillar (who was turning 3). He saw a google images search for caterpillar hats and saw a caterpillar suit and that was it. He wanted a caterpillar suit. See more about the suit here. I also got an early start on some butterfly wings for my 1 year old. I used polypropylene (like the cover of a notebook) and glued strips of tissue paper to it. It took a long time but they looked great and can be reused!

I came up with some craft ideas, possibly ones I'd seen before (the Pinterest/blogosphere is like that). So we had fingerprint caterpillars and tissue paper and peg (clothespin) butterflies.

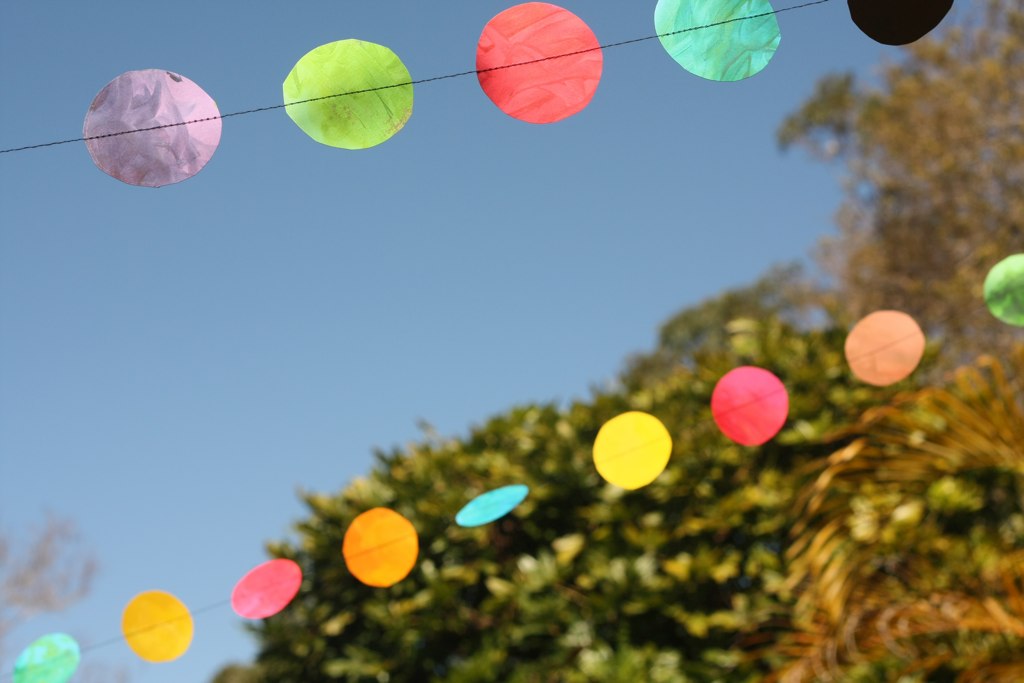
I also bought some coloured card and got my son doing some fingerpainting, which I cut into circles and sewed together to make a garland.


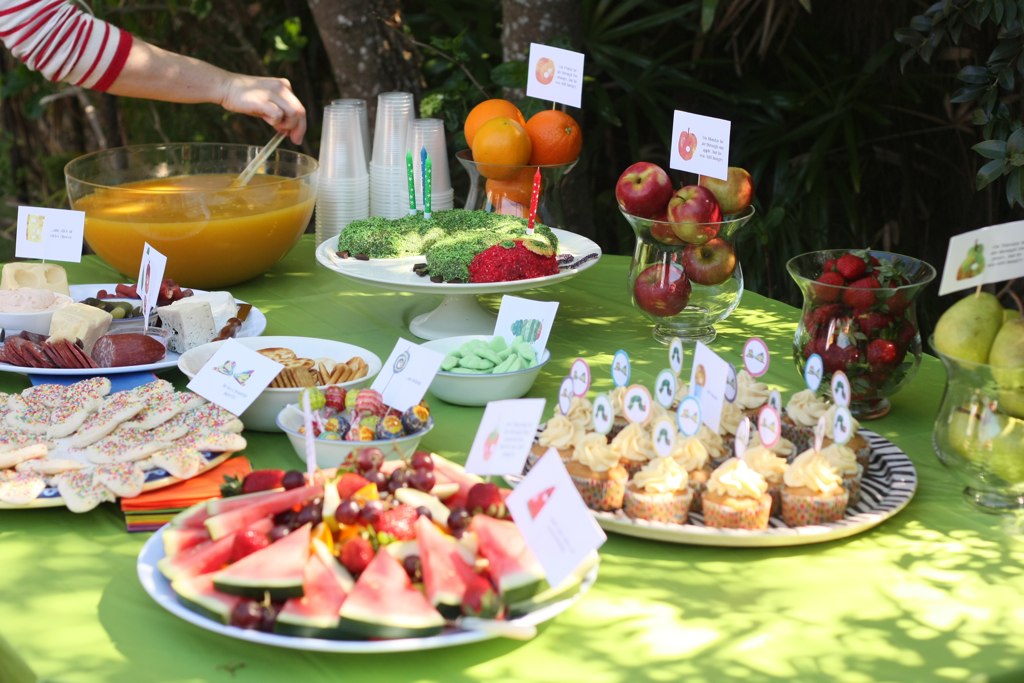
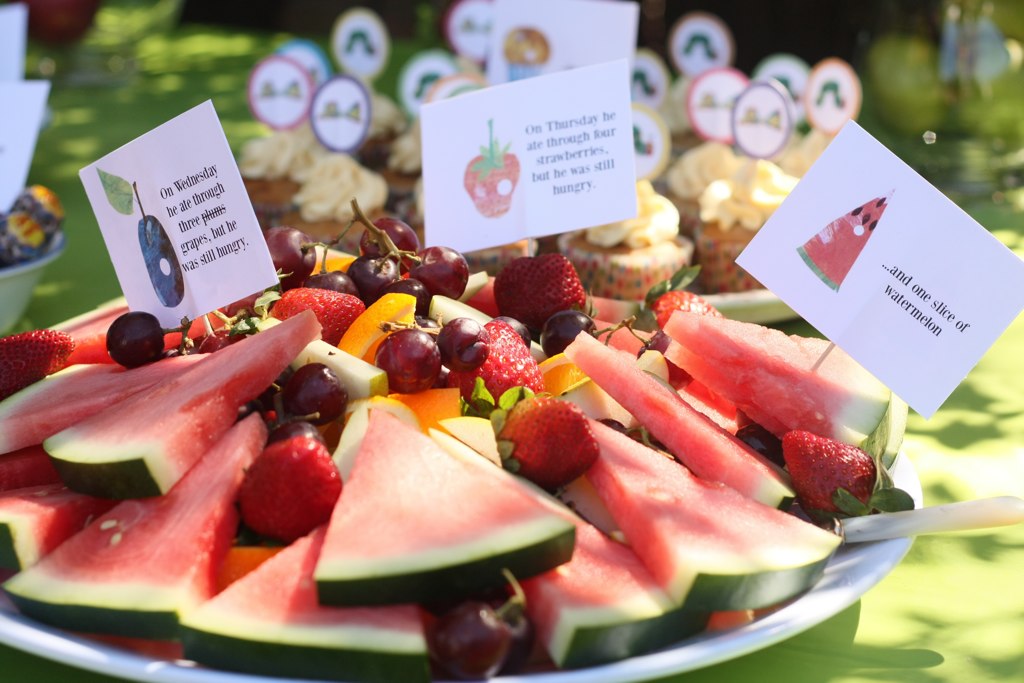
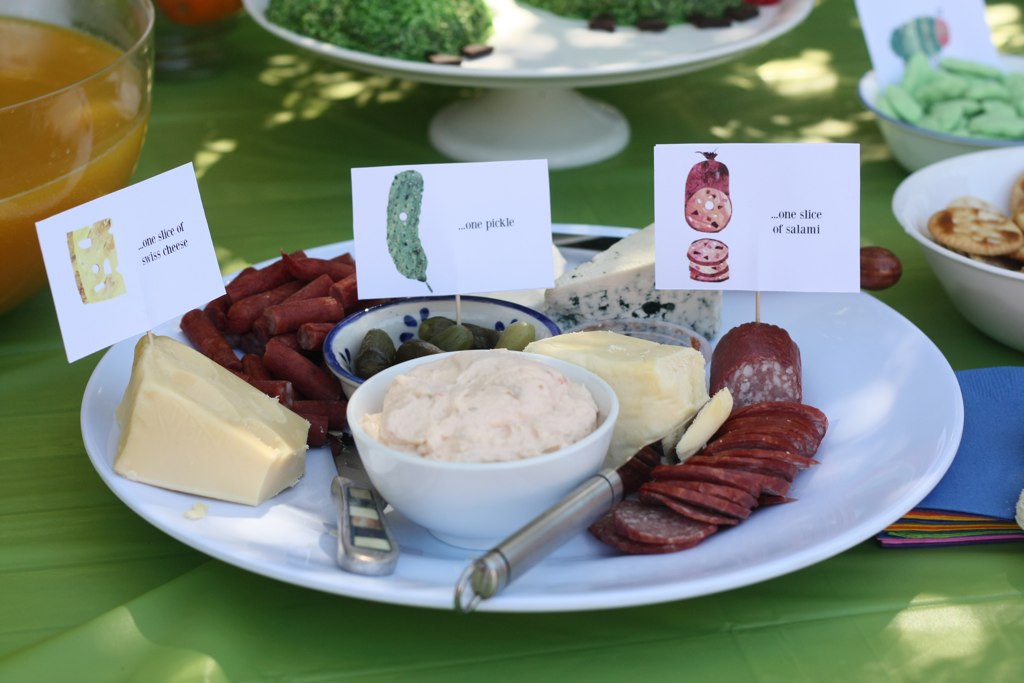
Food was easy to plan. Everything came from the book and I made signs just in case people didn't know the book as well as I do!

There were apples, pears, grapes instead of plums, strawberries, oranges and watermelon...

A cheese plate with swiss cheese, salami and pickles...
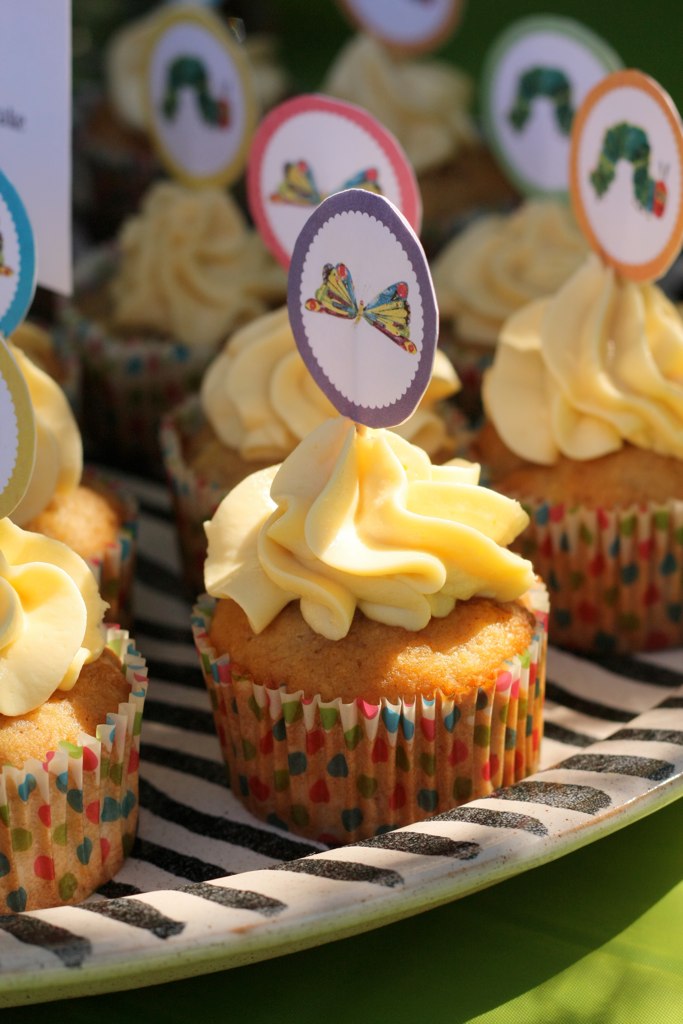
cupcakes... (hummingbird cake with cream cheese icing)
 
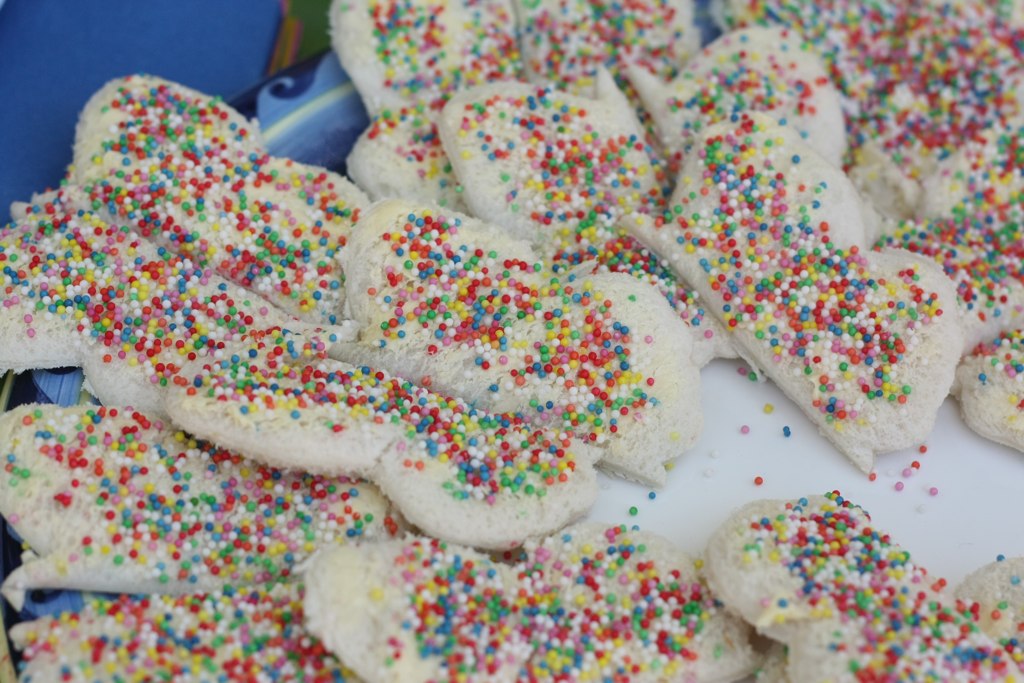
Butterfly fairy bread...

And I didn't get photos, but we served 'sausage' (cocktail frankfurts), 'cherry meat pie', lollipops (which didn't go down so well with my mum who is very protective of her carpet!) and caterpillar shaped lollies. I had ice cream cones and fairy floss to serve as the 'ice cream cone' but we completely forgot to serve them...
Mum also made crumbed chicken caterpillars which were delicious.

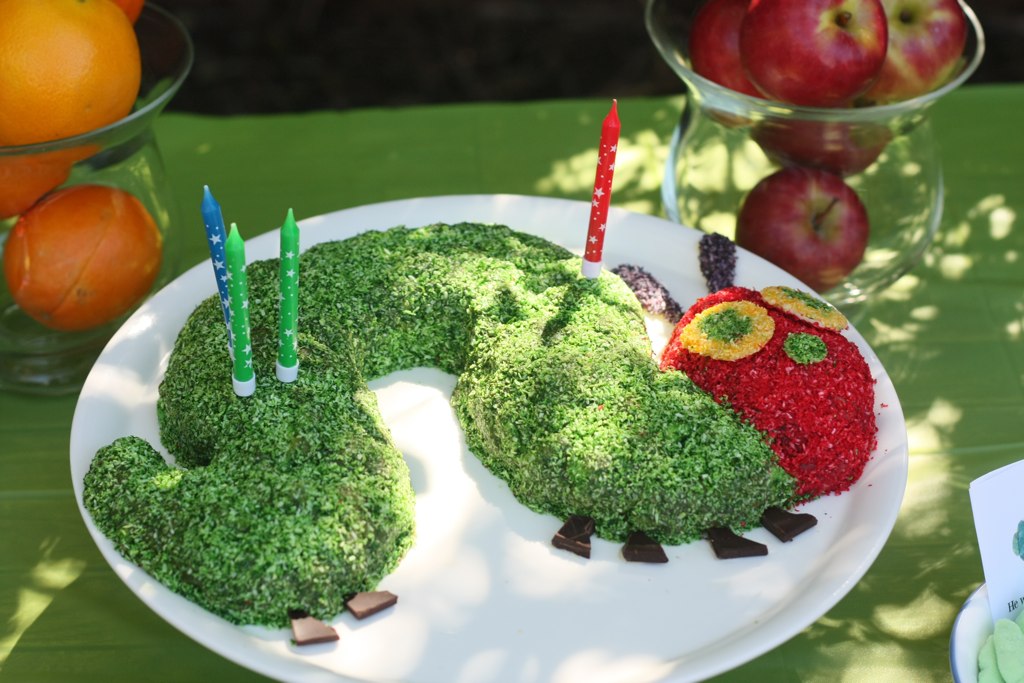
I made two cakes. A caterpillar shaped lolly cake for the kids (which took me about an hour and a half all up!) Lolly cake is apparently a NZ regular. We don't have eskimo lollies/fruit puffs in Australia so I used wacky watermelon clouds. The sour flavour really did not go with the biscuit/sweetened condensed milk cake, but it was only for the kids! Next time I'd use marshmallows or Clinkers I think...
I coloured the coconut with food colouring (before sprinkling it on) and made the eyes, nose and antennae from white chocolate ganache sprinkled with coloured coconut. The feet are just cut straight out of pieces of dark Lindt chocolate.


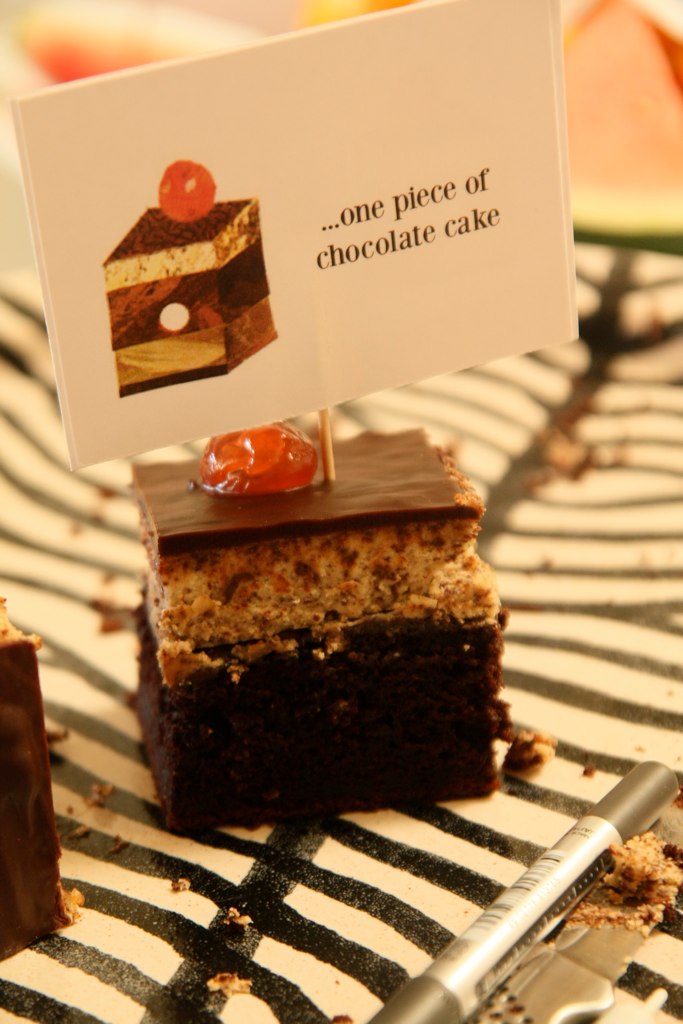
And a chocolate cake that was inspired by the 'one piece of chocolate cake' featuring a layer of choc chip cheesecake... I used this recipe but made it in an oven tray, and did the cake in just one layer. Also, I grated the chocolate in a food processor instead of using chocolate chips and topped it with ganache.

I think it was lots of fun for everyone (it's hard to know! I was running around doing things the whole time).

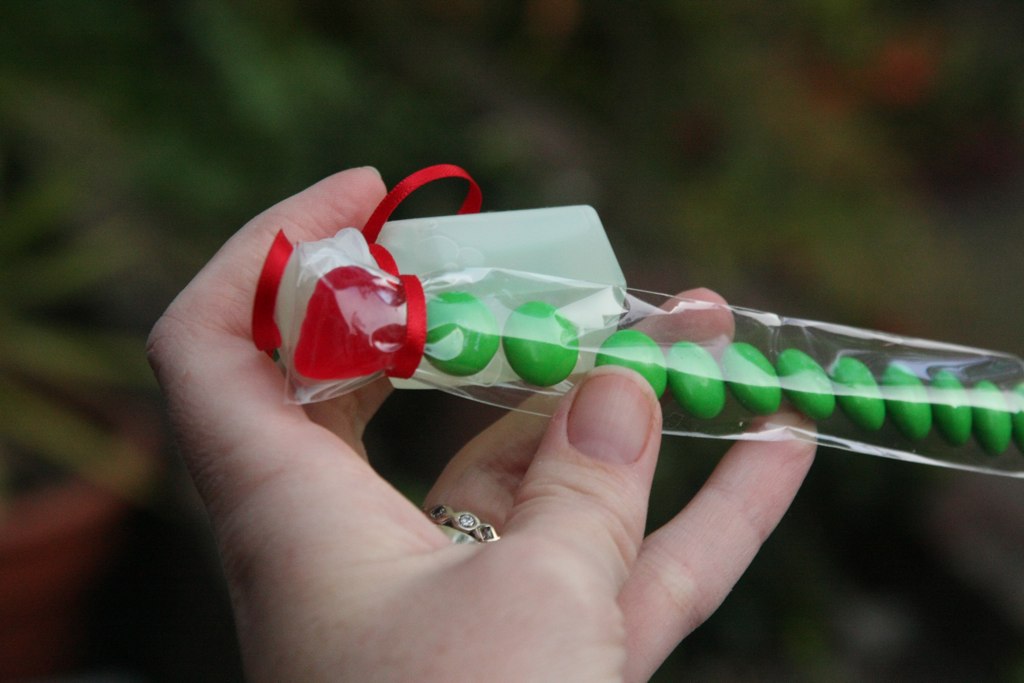
And I nearly forgot, for the favours I ordered long thin clear cello bags on eBay and filled them with green M&Ms with a red raspberry for the head. I also attached a thing of bubbles for fun.

It was definitely fun to plan. Though I'm very happy my life can return to normal now...

Friday, May 28, 2010

World's Ugliest Bootie

I was given this book for Christmas.
I've done a little felting before, mostly needle felting, so I thought I'd try wet felting these super cute booties. The instructions seemed easy enough, but I don't know what happened... I only did one. It took about an hour and is all lumpy and way too big. I don't think I'll be attempting a pair.

Friday, May 21, 2010

slow shipping

I've been waiting for 3 weeks for my bali pops to arrive from the states. I was hoping to make a throw as a wedding gift for a wedding today, but it's going to be late...


Wednesday, May 12, 2010

too cute...

You know when your child is quiet that he's found something interesting to play with. Usually something he's not allowed to play with. Well, I looked up and found that my son, Lenny, had discovered my quilting fabric and had completely unraveled a jelly roll. But he gave me the biggest smile all I could do was take a picture (or 5)!

Tuesday, April 27, 2010

First Sale

Woo Hoo! I just had my first Etsy sale! I had listed about 12 items a month or so ago, but had been disheartened when no one had bought any. Then out of the blue I had an order for three pairs from a woman in NSW. I've actually surprised myself by how excited I am... And I am definitely making more studs and stocking my shop up!

Here they are, all ready to ship:

Wednesday, April 21, 2010

Indy's Hunky Dory Quilt

I got Indy's quilt done just in time (we pulled up outside her house and I had 1cm of hand stitching to go!)

I have to say that I'm pretty happy with my first bed quilt. Free motion was a little tricky, and some of my stitches are a little far apart, but you really don't notice it unless you look up close.

So here it is, the Hunky Dory Girls Cot Quilt:

Thanks Kevin for the pic, and yes, I am wearing clothes behind there!

Thursday, April 1, 2010

I just received my new quilt fabric! Hunky Dory by Chez Moi for Moda
Looking forward to the girly quilts I am planning to make for my nieces! Does Indy count as a niece if she calls me (or will call me) aunty?

Yummy Yummy Chocolate Torte

It was my sister's birthday yesterday and I can't stopt hinking about the cake I cooked. It was so yummy and moist in the centre. Almost fudgy. It's actually a recipe for a traditional passover torte, but I changed the margarine for butter... I also used hazelnut meal instead of almond meal, just cos it was cheaper...


INGREDIENTS
• 125g butter
• 250g dark chocolate, chopped
• 5 eggs, separated
• 3/4 cup caster sugar
• 150g hazelnut meal

METHOD
1. Preheat oven to 180C. Line or grease a 23cm springform pan
2. Melt butter and chocolate over low heat and allow to cool
3. Beat whites until stiff; about 3 minutes.
4. In a separate bowl, beat yolks and sugar together until thick and pale; about 2 minutes.
5. Add in chocolate mixture and almonds. Fold beaten whites, 1/3 at a time, into chocolate mixture until no streaks of white remain. Pour into prepared pan.
7. Bake torte in preheated oven for 45 to 50 minutes, or until sides begin to pull away from pan and top is set in centre.  Cover the torte loosely with foil for the last 20 minutes of baking.
8. Allow to cool and invert onto a serving plate. Sift icing sugar over the top, and serve with cream, coulis, strawberries. chocolate sauce, whatever you like!

View the original recipe at All Recipes
 

Wednesday, March 31, 2010

Today I started a blog

So today I started a blog. I've had grand plans to start one many times, but starting and keeping up are different things, and I don't know if I can do the latter. We'll see. Mostly I want a place to share the things I make.

Now that I've spent the last hour hunting for a blogging site that has 'omina' available (obviously I gave up on that and settled for ominake... a little frustrated with the ominas who sign up for blogs then do nothing with them...) and setting up the look of my blog, it's time to feed my Little Guy and head to bed. Perhaps tomorrow I will show you some pictures of the baby things I made during my pregnancy...